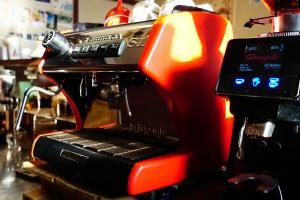
When it comes to choosing your first espresso machine, it can feel a bit overwhelming with all the options out there. But don’t worry! Let’s break it down into a few key points to help make your decision easier.
First, think about your skill level. If you’re just getting started, a machine with automatic settings can be super helpful. These machines take care of the tricky parts for you, making it easier to pull that first perfect shot. On the other hand, semi-automatic machines give you more control over the brewing process, which can be great if you’re looking to get more into the details as you learn.
Next, consider your budget. Espresso machines can range from affordable to quite pricey. It’s totally okay to start with something budget-friendly that still gets the job done well. Look for machines that have good reviews and decent features like a steam wand for frothing milk, as that opens up more drink options down the line.
Another important factor is the size of the machine. Make sure you have enough counter space for your new toy! Some machines are compact and ideal for smaller kitchens, while others might need more room. Check the dimensions and compare them to your available space before making a purchase.
Lastly, don’t forget to read user reviews. Other coffee lovers often share valuable insights about their experiences with different machines. You might find tips on what works best or which models are more reliable, helping you choose a machine that aligns with your needs.
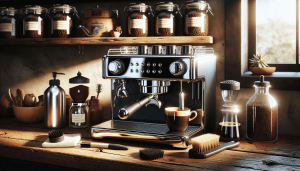
Essential Tools for Brewing Success
When it comes to perfecting your espresso game, having the right tools makes a world of difference. Whether you're just starting out or looking to upgrade your setup, here are some essentials that will help you pull that perfect shot.
1. Espresso Machine: This is your main player. Look for a machine that's easy to use and reliable. You don't need the fanciest model right away; something with a good steam wand and consistent temperature control will do wonders for your brews.
2. Grinder: A quality grinder is super important. Freshly ground beans are key for awesome flavor. Go for a burr grinder, as they give you a more even grind size, which translates to better extraction. It’s worth investing in one that's built to last!
3. Tamper: Don’t overlook this handy tool! A good tamper helps you compress your coffee grounds evenly, which leads to a balanced and tasty shot. Make sure it fits your portafilter snugly for the best results.
4. Scale: Precision matters in espresso making. A digital scale will help you measure your coffee and water accurately. Even small changes can make a big difference in taste, so don’t skip this step!
5. Frothing Pitcher: If you love lattes or cappuccinos, a frothing pitcher is a must-have. It allows you to froth milk perfectly, giving you that café-style texture and taste at home. Plus, a spouted pitcher makes pouring a breeze!
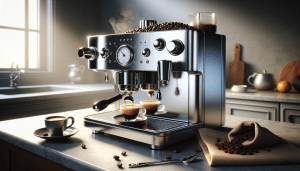
Step by Step Brewing Guide
Getting your first perfect espresso shot at home can feel a bit daunting, but with a little guidance, you'll be brewing like a pro in no time. Here’s a simple step-by-step guide that breaks down the process into manageable parts.
1. Gather Your Tools
2. Measure Your Coffee
Start with about 18-20 grams of coffee for a double shot. If you’re using a scale, it can help you get the right amount every time. Freshly ground beans are key, so consider grinding right before you brew.
3. Grind and Tamp
Grind your coffee to a fine consistency, like table salt. Then, place the grounds into your portafilter. Use your tamper to apply even pressure on the grounds; this is crucial for a good extraction. Aim for a nice, even surface.
4. Brew
Lock the portafilter into your espresso machine and start brewing. Aim for about 25-30 seconds for a double shot. Watch how the espresso flows—ideally, it should have a rich, golden crema on top. If it’s flowing too fast or too slow, you may need to adjust your grind or tamping pressure.
5. Enjoy Your Espresso
Once you’ve brewed your shot, savor it! You can enjoy it straight, or use it for other coffee drinks like lattes or cappuccinos. With practice, you’ll refine your technique and find the perfect brew to suit your taste. Happy brewing!
Perfecting Your Espresso Shot Technique
Getting that perfect espresso shot is both an art and a science. It might seem tricky at first, but with a little practice and the right technique, you’ll be brewing like a pro in no time. Here’s how to nail it!
First off, let's talk about beans. Freshness is key! Make sure you’re using freshly roasted coffee beans. Aim for a medium to dark roast for rich flavors. Grind them just before brewing for the best results. A fine grind is essential for espresso, so get yourself a quality burr grinder if you don't already have one.
Now, let’s focus on the espresso machine. Make sure it's preheated. A well-maintained machine will help you get that perfect extraction. Once you’re ready, dose around 18-20 grams of coffee into the portafilter and distribute it evenly. Tamping is super important here – press down firmly and evenly to create a smooth surface. A consistent tamp helps ensure the water flows through the coffee evenly.
When you pull the shot, keep an eye on the timing. Ideally, you want your espresso shot to take about 25-30 seconds. If it's flowing too quickly or too slowly, give your grind size a tweak. A good espresso shot should have a nice crema on top, which adds that velvety texture and flavor punch.
Finally, experiment! Everyone’s taste is different, so don't hesitate to adjust your grind size, dose, and extraction time until you find that sweet spot. Grab a cup, take a sip, and enjoy your journey to the perfect espresso shot.